|
Ron Stygar Carl Buckland Dale Beuning Forums Help
From RonStygar_at_aol.com Sun Oct 26 21:43:14 1997 From RonStygar_at_aol.com
For info on the 328is install, click here. Reading this over and over for correctness, makes me think (other than me) who the hell would do this. Why am I wasting my time writing this up. Then again, like I said in part one, taken one step at a time, its really a piece of cake. I really do not want to spend ten hours making a panel that most people would object to spending $50.00 for. I'm hoping that the instructions below act as a guide for you. Make your own, where time is not a part of the equation. Thats what I did, with no guide. Parts needed that were not mentioned in Part 1.
             BMW storage compartment 51 16 8 193 147 $16.00 retail
             Whitlam pipe thread compound, stock code IGB  $7.50 retail
              (explained in part 3)
The gauges mount in a modified forward cigar lighter / ash tray or storage assembly. Remove the cigar lighter / ash tray assembly by pulling out the ashtray and removing the screw. I relocated the cigar lighter to the flat area just ahead of the coin holder assembly. VDO Guages installed in 1997 318ti with custom mounting panel: 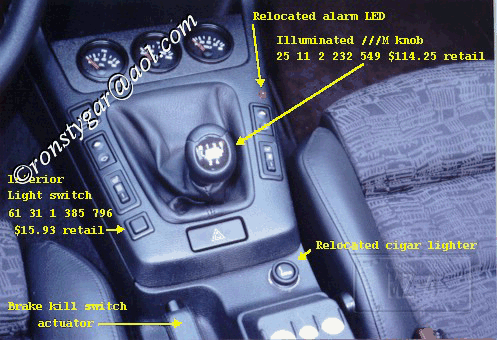
For this, center punch a mark 1 1/4 inches from the right side of the console that holds the cup holders and 7/8 inch from the rear of the shifter console. I removed the console and drilled a hole useing the 1 1/16 Lenox hole saw and filed it to size. I did not duplicate the recessed lighter hole that is present in the ashtray assembly. This would be difficult for me, or you, to do. The surface mount looks good. I relocated the alarm LED just forward of the shift console passenger side window switch. For this, center punch a mark 0.5 inches forward of the window switch frame and 5/16 inches in from the right of the frame. The hole size for the LED is 7/32. Taking the purchased storage compartment, I cut away the bottom of this assembly where it mounts and most of the top leaving roughly a 1/4 inch all the way around the perimeter of the assembly plus the back and right hand side. I also removed the plastic on the shift console where the ash tray assembly mounts to roughly 1/4 inch from the textured area. I then took the modified ash tray assembly (storage compartment) and laid it upside down onto a piece of 0.125 black textured plastic. Although the texture is different it looks better than a texture that approximately matches BMW. You could also have the carbon fiber guy make you this piece. You can purchase a 4' by 8' sheet of the BMW like texture for $100.00. I scribed the ash tray assembly shape onto a piece of this using a stainless steel scribe. I cut out the piece using a scroll saw, hand filing to the scribe line. I drilled three 2 1/16 inch holes, using the Lenox hole saw, to accommodate the three gauges. Take care to evenly space the holes and accommodate the ash tray assembly edges. There is ~ 5/8" from the edge of this piece to the top edge of the gauge at each side. There is ~ 5/32" between the top edges of the gauges.
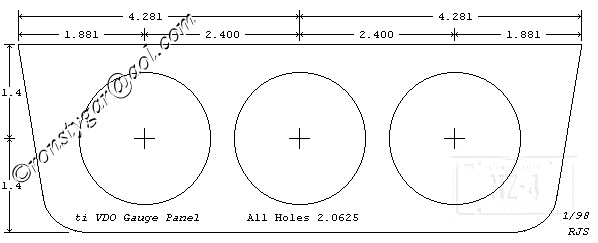
To do this right, you really need a drill press where you can reference it to a fence. Taper down, with a file, the front and side edges till the fit is perfect (relative to the storage assembly piece and the opening where it goes). Taper down means the bottom of the piece is smaller than the top. This piece sits on top of the cut out ash tray assembly. I glued the piece using Locktite Quick tite brush on. Since the setup time of this glue is short, I fashioned a fixture using angle brackets taped to my desk to accommodate the three hole piece face down. Apply the glue to the ashtray assembly top face and set the ashtray assembly (make sure you are lined up correctly) on to the three hole piece. I then, using the same glue, backed filled the inside edge. Be careful. The glue has a high flow rate. You do not want it to flow onto the finished areas. I then filled the top rear edge, where it meets the back of the ashtray, with a two part epoxy. Although it doesn't show, I masked off the edges to get a nice line. I installed the gauges alphabetically by width, left to right. Oil pressure, Oil temperature and Voltmeter. I tried all the combinations. This looks good at rest and in operation. I angled the top of the gauges ~ 30 degrees to the right referencing the front edge of the gauge mounting piece. They then line up when you look at them from the drivers seat. To mount the gauges (because of the limited height) you have to remove approximately 11/32 inches from the U shaped mounting bracket ends and studs. You replace the long VDO stud 4mm nuts with standard 4mm nuts. I also added 4mm flat and lock washers where they fit. You also have to cut the lamp holder tabs flush with the bottom of the tab hole. I then drilled new holes mid-way in the remaining tabs. I wired the gauge panel using 20 gauge teflon wire. I used edge cut stakons (Unlike the round ones with a hole, these have a straight front and sides) daisy chaining the ground (-) and a second wire to each lamp holders ground end which was soldered. I daisy chained the hot end of the lamp holders (soldered). On the hot end of the lamp holder tab, notch out (from the top of the tab) so that you turn the hole into a U-shape. I daisy chained the (+) using female tab connectors. VDO Guages installed in 1997 318ti with custom mounting panel: 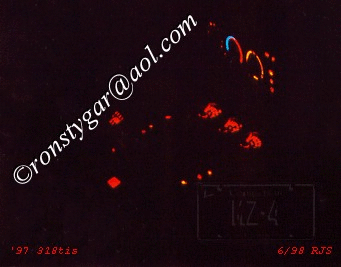
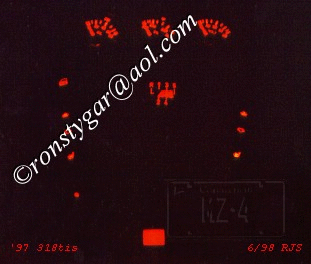
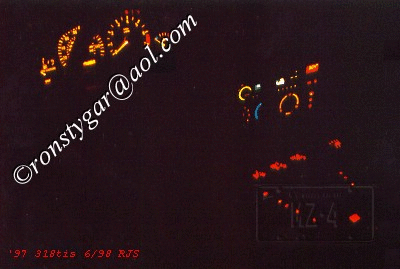
I connected the ground via a tap-in connector to the cigar lighter ground (brown). I connected the (+) to the purple wire (pin 2) of the factory alarm connector. This point is hot in accessory, run and start. I connected the dimmer controlled lighting wire (gray / red) to the lamp holders plus end. This is in the same area as the cigar lighter ground. If you were careful in making the gauge holder, it just sets in place with no mounting required. Pulling the sender wires slightly forward into the area of the shift boot and the weight of the gauges, simply holds it place. If concerned, a small dab of silicone would keep it in place, and yet be easy to remove if you had to.
See part 3: We will get the sender wires into the engine compartment,
install the senders etc...
For info on the 328is install, click here.
|

